목차
0. 튜토리얼 소개
https://sumo.dlr.de/docs/Tutorials/Hello_SUMO.html#routes
Hello SUMO - SUMO Documentation
1.1.0 --> Hello SUMO Introduction This tutorial aims at first time Sumo users. We are building the simplest net possible and let a single car drive on it. All files mentioned here can also be found in the /docs/tutorial/hello directory. The most recent ver
sumo.dlr.de
첫번째 튜토리얼의 목표는 하나의 차량이 도로 위를 주행하는 가장 간단한 도로 네트워크를 구성하는 것입니다.
SUMO 에서 도로 네트워크는 node(=junction)와 edge(node간의 연결)로 구성되어 있습니다.
이때 가장 간단한 도로 네트워크는 2개의 도로로 구성된 네트워크인데요. 이를 위해선, 총 3개의 node와 2개의 edge가 필요합니다. 2개 이상의 도로가 필요한 이유는 차량의 route 설정 시, 2개 이상의 edge가 필요하기 때문입니다.
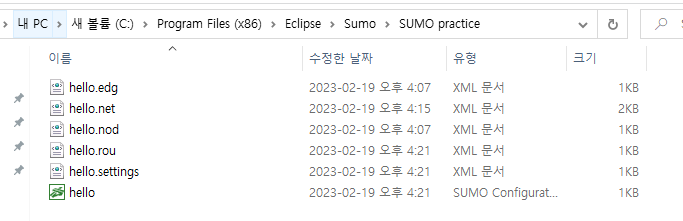
* 모든 파일은 SUMO가 깔려있는 곳에 위치(eg. C:\Program Files (x86)\Eclipse\Sumo)해야합니다.
1. Network 구성 방법
Nodes(*.nod.xml) + Edges(*.edg.xml) = Network(*.net.xml)
Node는 .nod.xml형식으로 작성합니다. node별 id로 구분하고, x, y 좌표(meters)로 위치를 지정합니다.
hello.nod.xml
|
1
2
3
4
5
|
<nodes>
<node id ="1" x ="-250.0" y ="0.0"/>
<node id="2" x="+250.0" y="0.0" />
<node id="3" x="+251.0" y="0.0" />
</nodes>
|
cs |
Edge는 .edg.xml형식으로 작성합니다. edge별 id로 구분하고, 연결할 'from' node와 'to' node를 node의 id를 사용하여 지정합니다.
hello.edg.xml
|
1
2
3
4
|
<edges>
<edge from="1" id="1to2" to="2" />
<edge from="2" id="out" to="3" />
</edges>
|
cs |
Network는 netconvert를 사용하여 자동으로 생성할 수 있습니다. network는 .net.xml형식으로 작성됩니다.
합쳐줄 node파일명과 edge 파일명을 지정하고, output-file의 파일명도 지정해줍니다.
터미널에서 다음 명령어 수행 시, 아래와 같이 hello.net.xml파일이 자동으로 생성됩니다. 야호!
|
1
|
netconvert --node-files=hello.nod.xml --edge-files=hello.edg.xml --output-file=hello.net.xml
|
cs |
hello.net.xml
|
1
2
3
4
5
6
7
8
9
10
11
12
13
14
15
16
17
18
19
20
21
22
23
24
25
26
|
<net version="1.9" junctionCornerDetail="5" limitTurnSpeed="5.50" xmlns:xsi="http://www.w3.org/2001/XMLSchema-instance" xsi:noNamespaceSchemaLocation="http://sumo.dlr.de/xsd/net_file.xsd">
<location netOffset="250.00,0.00" convBoundary="0.00,0.00,501.00,0.00" origBoundary="-250.00,0.00,251.00,0.00" projParameter="!"/>
<edge id=":2_0" function="internal">
<lane id=":2_0_0" index="0" speed="13.89" length="0.10" shape="500.00,-1.60 500.00,-1.60"/>
</edge>
<edge id="1to2" from="1" to="2" priority="-1">
<lane id="1to2_0" index="0" speed="13.89" length="500.00" shape="0.00,-1.60 500.00,-1.60"/>
</edge>
<edge id="out" from="2" to="3" priority="-1">
<lane id="out_0" index="0" speed="13.89" length="1.00" shape="500.00,-1.60 501.00,-1.60"/>
</edge>
<junction id="1" type="dead_end" x="0.00" y="0.00" incLanes="" intLanes="" shape="0.00,0.00 0.00,-3.20"/>
<junction id="2" type="priority" x="500.00" y="0.00" incLanes="1to2_0" intLanes=":2_0_0" shape="500.00,0.00 500.00,-3.20 500.00,0.00">
<request index="0" response="0" foes="0" cont="0"/>
</junction>
<junction id="3" type="dead_end" x="501.00" y="0.00" incLanes="out_0" intLanes="" shape="501.00,-3.20 501.00,0.00"/>
<connection from="1to2" to="out" fromLane="0" toLane="0" via=":2_0_0" dir="s" state="M"/>
<connection from=":2_0" to="out" fromLane="0" toLane="0" dir="s" state="M"/>
</net>
|
cs |
2. Route 구성 방법
차량 Route 구성 파일 : *.rou.xml
다음은 차량의 route를 지정해야 합니다.
차량 종류 vType
차량의 길이, acceleration, deceleration, maximum speed 등의 기본 정보를 설정할 수 있습니다. 또한, sigma값을 설정하여 random behavior특성을 부여할 수 있습니다. sigma=0일때는 deterministic 차량입니다. 차량 종류 id를 지정하여 실제 차량 생성 시 부여해줍니다. vType은 그랜저, 아반떼, 소나타와 같이 다양한 차종을 만드는 것과 같습니다.
route 생성
이동할 edge들을 차례대로 적어줍니다. 마찬가지로 id를 설정하여 route를 구분합니다.
vehicle 생성
위에서 생성한 vType을 사용하여 실제 차량을 생성하고 route도 지정합니다. 또한 departure시간도 지정합니다. 이외에도 customize할 수 있는 속성들이 더 있으니 공식 문서를 참고해보세요 :) 해당 예제에서는 2개의 동일한 route와 차종의 차량을 색상과 depart시간만 달리하여 생성해보았습니다.
hello.rou.xml
|
1
2
3
4
5
6
7
8
|
<routes>
<vType id="Car" accel="1.0" decel="5.0" length="2.0" maxSpeed="100.0" sigma="0.5" />
<route id="route0" edges="1to2 out"/>
<vehicle depart="0.0" id="veh0" route="route0" type="Car" color="1,0,0"/>
<vehicle depart="1.0" id="veh1" route="route0" type="Car" color="0,1,0"/>
</routes>
|
cs |
3. GUI 세팅
GUI setting : *.settings.xml
우선, sumo-gui를 통해 시뮬레이션을 돌릴 때, settings.xml파일이 필요하므로, simulation setting에 관한 파일인 hello.settings.xml 을 작성합니다.
hello.settings.xml
|
1
2
3
4
|
<viewsettings>
<viewport y="0" x="250" zoom="100"/>
<delay value="100"/>
</viewsettings>
|
cs |
4. Configuration
전체 configure: *.sumocfg
이후, 위에서 작성한 net-files(hello.net.xml), route-files(hello.net.xml), gui-settings-file(hello.settings.xml)를 합쳐 configuration파일을 작성합니다.
input에 network파일, route파일, gui setting 파일명을 입력합니다.
time에는 원하는 총 시뮬레이션 time을 설정합니다.
hello.sumocfg
|
1
2
3
4
5
6
7
8
9
10
11
|
<configuration>
<input>
<net-file value="hello.net.xml"/>
<route-files value="hello.rou.xml"/>
<gui-settings-file value="hello.settings.xml"/>
</input>
<time>
<begin value="0"/>
<end value="10000"/>
</time>
</configuration>
|
cs |
5. Run Simulation
2가지 버전으로 시뮬레이션을 실행할 수 있습니다.
1) gui 사용 버전
|
1
|
sumo-gui -c hello.sumocfg
|
cs |
2)gui 사용하지 않는 버전
|
1
|
sumo -c hello.sumocfg
|
cs |


'Traffic Simulation > SUMO' 카테고리의 다른 글
| OSM에 쿼리 적용하여 SUMO지도 생성(Overpass Turbo) (2) | 2022.02.23 |
|---|---|
| [Routing] SUMO + TraCI + DQN Routing (1) | 2022.02.15 |
| [Routing] SUMO + TraCI + Qlearning Routing (0) | 2022.02.14 |
| [Routing] SUMO + TraCI + Random Routing (0) | 2022.02.08 |
| [Tutorial] TraCI4Traffic Lights (0) | 2022.02.05 |